Our valuable data is found in tech devices like computers smartphones and tablets in today’s digital era. These devices securely store data within their motherboard. But what if that significant motherboard gives out? Don’t let worry cloud your face – we’ve got the solution: Data retrieval from a dead motherboard.
Within this comprehensive guide we’ll tackle the challenge of rescuing your data from a dead motherboard. Our mission is clear: We’ll guide you through the process of How to Retrieve Data From a Dead Motherboard. As you read on get ready for an engaging journey.
No matter you’re in this situation or just want to know let’s explore how to retrieve data from a dead motherboard.
Assessing the Situation and Gathering Tools for Retrieving Data From A Dead Motherboard
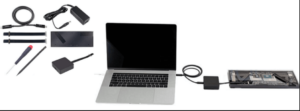
Confirm a Dead Motherboard
When you’re facing the challenging situation of a dead motherboard remember to stay calm and take action step by step. Panicking won’t assist you; instead take a calm breath and let’s analyze the situation together.
Check The Motherboard Before You Act
Before taking action carefully analyze the situation. First determine if the motherboard is completely unresponsive/dead or if there are fitful signs of life. Smell your phone or device to check for unusual smells or burnt components. These actions will help you understand the extent of the issue guide you and take you to the next steps.
Essential Tools for Data Retrieval from Dead Motherboard
Having the right tools is important for this data retrieval attempt. Here’s what you’ll need.
1. Screwdrivers
A set of screwdrivers with different heads is essential for opening the device.
2. Antistatic Wristband
This protects you from electrostatic discharge protecting delicate components.
3. USB-to-SATA Adapter
This handy tool lets you connect the hard drive to another device via USB.
Additional Tools and Precautions For Recovering Data From a Dead Motherboard
You might also require more precautions and additional tools depending on your specific situation.
-
External Hard Drive or USB
To store the retrieved data.
-
Thermal Paste
Removing and reattaching the CPU thermal paste ensures proper heat conduction.
-
Workspace Setup
Choose a clean well-lit and static-free area for your work.
Well Preparation Is The Key to Successful Data Retrieval from Dead Motherboard
Setting up the platform with careful planning makes sure for smoother data recovery. Attention to detail matters. Now moving to the next step where we guide you through this journey to recover valuable digital data.
Ensuring Safety Precautions Is Highly Important

● Stay Safe While Recovering Data from a Dead Motherboard
When dealing with electronics for data retrieval ensure safety to protect against accidents and ensure a smooth process.
● Guard Against Electrostatic Discharge
Using an antistatic wristband is vital. It guards your delicate parts against static electricity preserving your motherboard’s integrity and overall component well-being.
● Creating an Optimal Workspace
Messy and dark spaces make tasks harder. Choose a clean well-lit area to reduce dirt interference and see your work.
What You Need for a Safe Workspace
-
Antistatic Mat
Placing your motherboard on an antistatic mat minimizes static discharge risk.
-
Proper Lighting
Adequate lighting prevents eye strain and helps you spot details accurately.
-
Well-Ventilated Area
Good ventilation prevents overheating and enhances your comfort during the process.
-
Organized Tools
Keep your tools orderly to avoid confusion and accidental damage.
Prioritize safety to protect your hardware and efforts during data retrieval from a dead motherboard. A secure workspace and precautions lead the way to unlocking valuable insights from the world of electronics.
Disassembling Motherboard
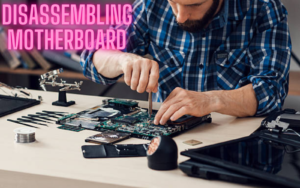
We’ve now reached the disassembling process which demands careful attention and mindfulness. Let’s learn how to uncover the motherboard to facilitate data recovery.
Safely Uncovering the Motherboard
Step 1: Prepare Your Workspace
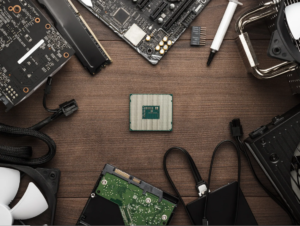
Before you start remember the significance of a tidy and well-lit workspace. Collect your tools and wear an antistatic wristband to defend against static electricity.
Step 2: Remove the Casing
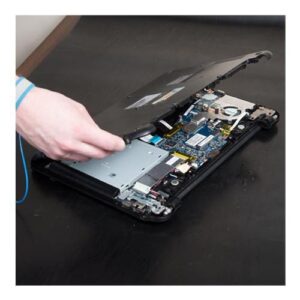
Carefully detach the device’s casing revealing the intricate interior. Patience is key here; rushing this step could lead to unintended damage.
Step 3: Disconnect Connectors
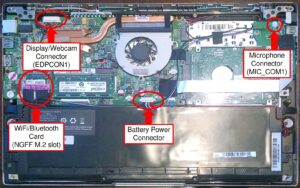
Once the casing is off you’ll notice connectors on the motherboard regardless of the device. Find and softly disconnect these connectors such as power and data cables while remembering where they go for reassembly.
Step 4: Opening the Screws
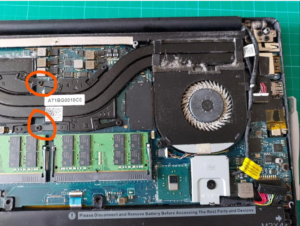
Gently take out the screws that hold the motherboard in position. It’s important to keep these screws organized maybe using small containers so you don’t mix them up. This ensures that when you reassemble everything fits back correctly and securely.
Step 5: Remove Additional Components
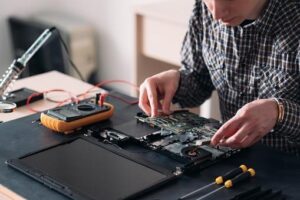
In some cases you might see additional parts that could be in the way of removing the dead motherboard. These could include things like cooling systems or other modules. If you’re dealing with a smartphone’s motherboard there might be camera battery sensors and coils connectors. No matter the situation taking apart the motherboard requires careful attention and a focused mind to avoid mishaps.
Step 6: Document Your Progress (Optional)
At every step document your disassembly process. This documentation whether through photographs or notes becomes your roadmap when reassembling the device. A clear record will ensure you get all the important details during reconstruction.
Step 7: Handle with Care
When you lift the motherboard admire its intricate design. Hold it by the edges to avoid touching delicate parts.
Disassembling the motherboard exposes your data’s core. Proceed carefully record your steps and approach reassembly with patience and focus.
Identifying Data Storage Components
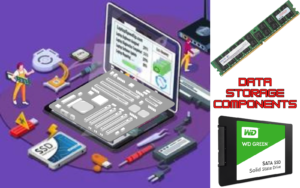
Now it’s time for a closer inspection of the motherboard components. Among them you’ll discover a crucial component responsible for storing your entire data.
Within a motherboard’s complex design components are dedicated to storing your valuable data. Let’s explore the core of data storage and reveal the key parts responsible for holding the information you want to recover.
Data Storage Components: Understanding the Essentials

1. Hard Drives (HDDs)
These fantastic machines have been reliable data keepers for years. Identified by their spinning disks HDDs use magnetism to store your data on platters.
2. Solid State Drives (SSDs)
Today’s impressive storage technology SSDs utilize flash memory for data storage. They provide quicker speeds and more excellent durability compared to older HDDs.
3. NAND Chips
You often find NAND chips in phones and tablets holding data in tiny memory cells. These chips are small light and energy-efficient perfect for mobile gadgets.
How to Identify Dead Motherboard’s Components
1. Consult the Motherboard Manual
Refer to the motherboard’s manual if available. It often includes a detailed diagram of the board helping you pinpoint storage components.
2. Visual Inspection
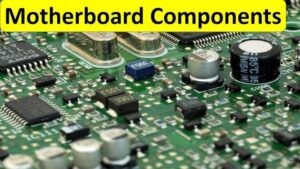
Examine the motherboard for different storage parts. HDDs and SSDs are bigger while NAND chips are smaller and subtle in shape and size. A helpful choice is to view images of the motherboard’s components. Many pictures are available on Google Images and you can also watch videos on platforms like YouTube.
3. Check Labels
Some motherboards label storage components making identification easier. Look for terms like “HDD” “SSD” or “NAND.”
Targeting the Right Component To Retrieve Data From A Dead Motherboard
The correct storage component is key to successful data retrieval from a dead motherboard. Picking the wrong one can lead to fruitless efforts. Once identified it’s time to prepare for the delicate extraction task.
Why Identification Of the Right Storage Part Is A Crucial Factor
Different storage components require different retrieval methods. Attempting to retrieve data from an HDD differs from extracting it from an SSD or a NAND chip. Identification accuracy ensures you apply the correct techniques minimizing the risk of damage and maximizing your chances of success.
External Data Retrieval from a Dead Motherboard Methods
When your motherboard goes quiet external data retrieval methods act as a bridge to access your valuable information. Let’s discover how external data retrieval works and how it can revive an inactive storage part.
Introducing the USB-to-SATA Adapter: Your Data Lifeline
1. Understanding the Adapter
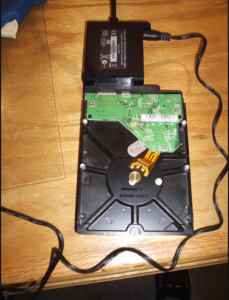
The USB-to-SATA adapter is a compact translator between your storage component and a functional computer. It’s your passport to accessing data stored within.
-
Preparation
Ensure both your storage component and the computer are powered off. Safety first!
-
Secure Connection
Connect the SATA end of the adapter to your storage component. The USB end connects to an available USB port on your computer.
-
Power Up
Turn on your computer and activate the storage component. Listen for the comforting hum a sign that life is returning.
2. Copying Data: The Winning Moment
-
Recognition
Your computer should detect the connected storage. It might ask you to set up the drive but avoid formatting it!
-
Navigate and Select
Open your file explorer and locate the storage component. Navigate to the data you wish to retrieve and select the files or folders.
-
Copy and Paste
With a confident right-click select “Copy.” Then navigate to your destination on the functional computer and right-click again – this time choose “Paste.”
-
Patience is a Virtue
Data transfer may take some time depending on the volume of information. Be patient and allow the magic of retrieval to unfold.
Transferring Treasures: From the Dead Motherboard to Life
As your data moves from the storage to the computer it’s a big win. The USB-to-SATA adapter has brought the silent back to life letting you bring back your memories documents and important files. With each successful transfer you’re getting closer to returning to your digital world.
Safely Store in A Secure
When using external methods be gentle with your data. Keep the recovered data safe and think about getting expert help if necessary. You’ve made progress by transferring data but the journey must be finished.
Professional Data Recovery Services
In the complex field of data recovery turning to skilled experts is often the wisest path. Explore the professional data recovery services world and discover the benefits of seeking help from experienced professionals.
Power Of Professional Help
-
Professional Expertise
Data recovery experts are skilled players in adepting at rescuing data from complex situations.
-
Specialized Tools
Like a skilled worker uses special tools data recovery experts have advanced equipment to restore your valuable digital files carefully.
Challenges You May Have to Face When Attempting DIY Data RecoveRy From a Dead Motherboard
-
Potential Risks
DIY data recovery can be risky and may damage your important data.
-
Technical Precision
Data recovery is more than just connecting wires; it requires an accurate technical dance that only skilled experts can perform.
Benefits of Professional Help: Peace of Mind and Optimal Results
-
Comprehensive Evaluation
Experts carefully assess the damage and decide the best steps after a thorough examination.
-
Tailored Approach
Every data recovery situation is unique needing a tailored approach that experts carefully design.
-
Maximizing Success
The correct steps improve the chances of returning your data ensuring your digital memories are not gone forever.
The Price of Expertise: Balancing Cost and Value
-
Cost Considerations
While professional services have a cost the value of getting back your important data is much higher than the price you pay.
-
Investment in Peace
Consider it like securing your peace of mind. Your data memories and important information are truly valuable and deserve protection.
Additional Tips and Considerations
-
Handle with Car
Tread Softly in Delicate Territory
-
Gentle Approach
Imagine every part is delicate glass – a gentle touch prevents accidents.
-
Stay Anti-Static
Wear the wristband as a safety reminder in this careful process.
Overcoming Obstacles: When Challenges Arise
-
Dealing with Hurdle
Even when you’re ready things can get tricky. If the outside ways don’t work stay hopeful.
-
Expert Help
If your data remains hidden experts could hold the solution. They’re great at solving challenging problems.
Summing Up
We hope you’ve learned important techniques in our exploration of recovering data from dead motherboards. Your knowledge has grown from understanding the situation to finding data storage parts.
Success comes from being careful. Every step like taking it apart or using external methods needs your attention. Delicate parts need your steady hand.
Remember be patient. If things get tough experts can help you. Their knowledge is valuable. With your new understanding solving the mystery of data recovery becomes a puzzle you can solve.
You’re ready to retrieve data from dead motherboards with what you’ve learned. Your journey shows it’s possible to find treasures step by step.
Data Retrive from a dead motherboard is not just a possibility; it’s a reality!
